It’s 2:47 a.m. on a Tuesday. Your production supervisor calls with the news every plant manager dreads: Line 3 is down. A critical export order for 80,000 laminated woven sacks will miss its container. After a tense hour of troubleshooting, the root cause is embarrassingly simple—a seized shuttle wheel bearing that hadn’t been greased in two weeks. The financial sting of that one oversight? Over $12,000 in overtime, air freight, and customer penalties.
Unplanned downtime doesn’t just steal margin; it erodes the trust you’ve built with buyers who depend on just-in-time delivery. Keeping your polypropylene tape weaving lines in motion isn’t about heroic midnight repairs. It’s about a disciplined, preventive routine that treats maintenance as a profit center, not a cost center. And while consistent care makes the biggest difference, beginning with a machine architected for serviceability transforms daily upkeep from a chore into a quick, predictable task.
Why Do Weaving Lines Fail Before Their Expected Lifespan?
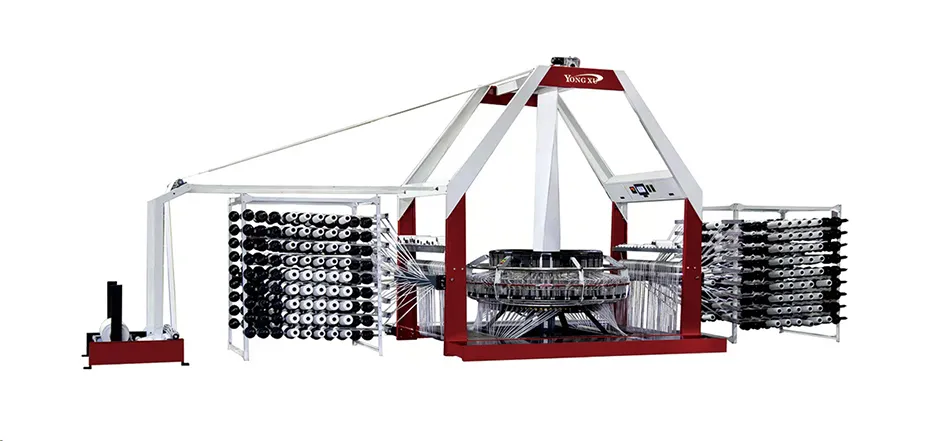
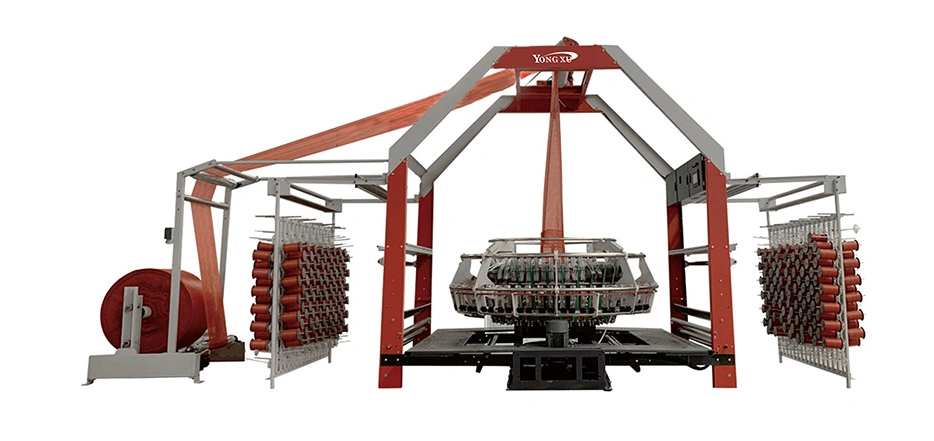
Walk through any woven bag plant that has battled chronic breakdowns, and patterns emerge. Dust accumulation, erratic lubrication, ignored tension drift, and “run-to-failure” thinking top the list. In a typical six-shuttle circular weaving machine processing high-denier tapes at 160 picks per minute, the reed, heald wires, and shuttle race are bombarded with microscopic tape wax and plastic fines every second. Left unchecked, this abrasive cocktail accelerates wear on guide rollers and bearings, silently consuming component life.
But the data tells an optimistic story. According to a field survey across 48 packaging producers, plants that adopted a standardized weekly maintenance protocol saw a 62% reduction in unplanned stops and extended major component life by an average of 2.7 years. The lesson? Most early failures are preventable with straightforward, consistent habits.
Step 1: Daily and Shift-Level Cleaning – Your First Line of Defense
Start every shift with a five-minute visual and hands-on check. Use dry, oil-free compressed air (regulated below 0.4 MPa to avoid forcing debris into bearings) and a soft brass brush to clean:
-
Reed and heald frame area: Remove tape dust buildup that causes erratic weft insertion and broken picks.
-
Shuttle guides and raceway: Wipe with a lint-free cloth; built-up friction here directly increases energy consumption and shuttle wear.
-
Drop wire and warp stop motion tracks: False stops from dust accumulation waste productive hours and frustrate operators.
Keep a simple laminated checklist at each machine. Operators should sign off at the start, mid-shift, and 30 minutes before handover. This ritual alone catches about 40% of the issues that would otherwise escalate into breakdowns.
Step 2: Lubrication – Why Guessing Hurts Your Machine
If cleaning is the first line of defense, precise lubrication is the lifeblood. A circular weaving machine relies on a cam-driven shuttle race, dozens of rolling-element bearings, and oscillating shafts that demand exact grease consistency. We’ve seen plants use whatever grease was on sale, only to face hardened deposits that blocked oil galleries and scored cam tracks within months.
Non-negotiables for a sound lubrication program:
-
Grease type: Use an NLGI #2 lithium-complex grease with EP additives suitable for moderate speeds and loads. High-temperature variants are needed if ambient plant temperatures regularly exceed 40°C (104°F).
-
Interval: Most looms require shuttle wheel bearing greasing every 72 operating hours and main cam track greasing every 150 hours. Adhere strictly to the manufacturer’s schedule—not “when it sounds dry.”
-
Quantity: Over-greasing blows seals and attracts dirt. Two to three pumps from a calibrated gun per bearing point are usually sufficient.
-
Centralized systems: If your looms feature centralized lubrication, verify that every distribution block delivers an even flow. Blockages in one line can starve a bearing while others flood.
Step 3: Tension Management – The Silent Output Killer
Weft and warp tension that drifts out of specification causes more “mystery” quality defects than any other factor: curling fabric edges, slack selvedges, and sudden tape breakage. Calibrate the warp let-off and fabric take-up mechanisms biweekly using a handheld tension meter. A target tension range of 2.5–4.5 cN/dtex for polypropylene tapes maintains a stable shed and uniform pick density. Document readings; a trending rise often indicates friction buildup in the creel or warp beam bearings, not a faulty tensioner.
Step 4: Electrical Systems and Safety Interlocks
Dust conductive enough to bridge low-voltage control circuits is a real problem in weaving sheds. Monthly, blow out control cabinets with dry air and check that cooling fans are operational. Tighten terminal screws—vibration loosens them over time. Equally important, test all safety gate switches and emergency stop buttons weekly. A machine that’s safe to operate is one that stays productive.
Four Maintenance Myths That Quietly Destroy Loom Life
Myth 1: “If it’s running smoothly, it doesn’t need scheduled downtime.”
The most destructive belief on the floor. A circular weaving machine running 24/7 without inspection will hide developing cracks in shuttle bodies or worn cam followers until catastrophic failure. Short, planned monthly shutdowns of 4–6 hours for thorough inspection are far cheaper than the 48-hour rebuilds caused by neglect.
Myth 2: “Any spare part that fits will do.”
Generic shuttle wheels, copied bearings, or substitute belts often differ in hardness, fit tolerance, or dynamic balance. The result is accelerated wear on mating components and higher vibration. Genuine parts are engineered to the original design envelope and come with traceable quality assurance.
Myth 3: “More oil equals better protection.”
Excess lubricant causes churning, overheating, and seal damage. In worst cases, it leaks onto the fabric, creating stain defects and costly claims.
Myth 4: “We don’t need a maintenance log; our technicians remember everything.”
Memory is fallible. A simple digital or paper log tracking lubrications, part replacements, and tension adjustments reveals patterns—such as a bearing failing every 2,000 hours—that trigger proactive replacement before failure.
Building a Preventive Maintenance Plan That Actually Works
Take your maintenance from reactive to systematic. Map every loom’s critical components (shuttle wheels, cams, heald frames, bearings, belts) and assign each a frequency—daily, weekly, monthly, quarterly. Use a color-coded wall board or a basic CMMS (computerized maintenance management system) to display upcoming tasks. When replacement is inevitable, insist on manufacturer-specified components to maintain design integrity and safety compliance.
Embedding a culture of “found during inspection” rather than “discovered by breakdown” does more than protect iron; it protects your delivery promises and your team’s morale.
Monitoring That Alerts You Before a Problem Escalates
For plants ready to take the next step, consider adding condition-monitoring sensors to critical points. Vibration sensors on main cam bearings and temperature probes on shuttle raceways can detect abnormal patterns days or weeks before a failure. They transform your maintenance strategy from calendar-based to condition-based—saving parts that still have useful life and avoiding the ones about to let go.
When Maintenance-Forward Design Meets Daily Discipline
Even the most committed maintenance team struggles with a machine that wasn’t designed to be serviced easily. Features like bolt-on guards that require five tools to remove, hidden grease nipples, and non-modular shuttle assemblies turn a 10-minute job into an hour-long wrestling match. Over time, those friction points tempt shortcuts—and reliability slips.
That’s why thoughtful engineering matters. Modern looms that integrate centralized grease banks, quick-change shuttle bodies, and wide-opening access panels can cut routine service time nearly in half. Fewer hours spent on upkeep means more hours producing saleable fabric, and a faster return on your equipment investment. If you are evaluating a new line or planning an upgrade, it’s worth looking into how machine architecture can simplify your team’s daily reality.
Disclaimer: This article provides general maintenance guidance based on industry practice. Always follow the official operating and service manual for your specific machine model and consult a qualified technician before altering any maintenance procedure.